I’ve reviewed solar lighting projects across East and West Africa, and one lesson keeps repeating: systems don’t fail because of panels or batteries—they fail because of poor design.
In off-grid environments, a single miscalculation can leave an entire street dark within days.
Reliable solar street lighting requires more than quality components—it demands precise system design, tailored to the local climate and actual daily load.
Here’s how we design systems on real project sites, step by step.
Why Does System Design Matter in Solar Street Lighting?
In 2022, I worked with a contractor in Lira, Uganda. He had imported sleek all-in-one lights from China. Specs looked perfect—but the lights failed on the third cloudy day.
The issue wasn’t the hardware. It was the system sizing, which ignored local sun hours and autonomy needs.
Solar design is not plug-and-play. Without proper load calculations, sun-hour data, and margin for cloudy days, even premium systems collapse.
Common failures I see:
- Lights shutting down after 1–2 rainy days
- Batteries destroyed by deep discharges within a year
- Oversized, overpriced systems with wasted capacity
- Controllers burning out from mismatched voltages
What Are the Core Components of a Solar Street Light System?
| Component | Why It Matters |
|---|---|
| Solar Panel | Must match load and sun hours—undersizing = blackout |
| Battery | Stores energy—ideally sized for 3–5 nights autonomy |
| Charge Controller | Protects battery health, prevents over/under-charge |
| LED Fixture | Defines total load; efficiency affects system sizing |
| Pole | Impacts light coverage and structural stability |
Optional extras like PIR sensors or hybrid AC backup only add value after the basics are sized correctly.
How Do You Design a Solar Street Light System?

Let’s design a 60W LED system in Kampala, Uganda, step by step.
Step 1: Load Calculation
| Item | Value |
|---|---|
| LED Wattage | 60W |
| Operating Hours | 9h/night |
| Base Consumption | 60W × 9h = 540Wh |
| Adjusted for losses (×1.3) | 702Wh/day |
This accounts for controller inefficiency, wiring, and temperature losses.
Step 2: Solar Panel Sizing
Average sun hours in Kampala: 5.2 hours/day.
Formula:
Panel Wp = Load ÷ Sun Hours × 1.3
702 ÷ 5.2 × 1.3 ≈ 175Wp
➡️ I specify 2 × 100W panels to add margin for dust and seasonal shading.
Step 3: Battery Sizing
Formula:
Battery Ah = (Load × Autonomy Days) ÷ (V × DoD × Efficiency)
Parameters:
- Autonomy: 3 days
- Voltage: 12V
- Battery type: Gel (DoD = 0.6)
- Efficiency: 0.85
702 × 3 ÷ (12 × 0.6 × 0.85) ≈ 344Ah
➡️ Best fit: 2 × 200Ah gel batteries.
| Battery Type | Lifespan (Cycles) | DoD | Maintenance | Field Note |
|---|---|---|---|---|
| LiFePO₄ | 2000–4000 | 0.8 | Very low | High cost, ideal for premium sites |
| Gel | 1000–1500 | 0.6 | Low | Best balance for rural installs |
| AGM | 800–1200 | 0.5 | Medium | Budget option, limited lifespan |
Step 4: Controller Sizing
Formula:
Controller Amps = Isc × Panel Count × 1.3
Each 100W panel: Isc = 5.2A.
5.2 × 2 × 1.3 = 13.5A
➡️ Use a 20A MPPT controller.
In Togo, we once cut costs with PWM controllers. Within a year, panels degraded faster and we had to replace the system. MPPT is worth the investment.
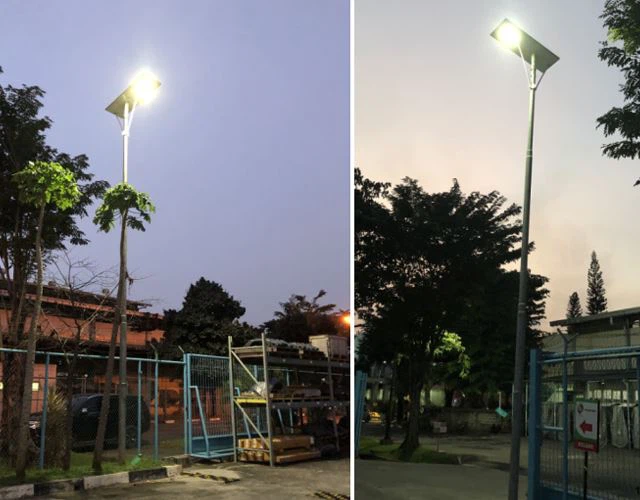
Step 5: Pole and Fixture
Lighting design = coverage + durability.
| Application | Pole Height | Material | Mounting |
|---|---|---|---|
| Pathways | 3–4m | Steel or Aluminum | Embedded |
| Urban Streets | 6–8m | Galvanized Steel | Flange-mounted |
| Coastal Highways | 9–12m | Heavy-duty Steel | Concrete base |
In coastal Ghana, we reinforce poles with tapered ends and thicker flanges to withstand storms.
Example: Full System Design for Kampala
| Component | Specification |
|---|---|
| Load | 60W × 9h × 1.3 = 702Wh/day |
| Solar Panel | 2 × 100W panels |
| Battery | 2 × 200Ah Gel, 12V |
| Controller | 20A MPPT, 12V |
| Pole | 6m galvanized, flange mount |
We’ve replicated this exact setup for schools, warehouses, and rural markets—and many units have run over 3 years without a single failure.

What Mistakes Cause Solar Lighting Systems to Fail?
| Mistake | Real Impact |
|---|---|
| Underestimating load | Lights go off before dawn |
| No allowance for cloudy days | System fails after 1–2 rainy days |
| Oversized inverter on DC load | Power wasted, budget wasted |
| Mismatched voltages | Total system failure |
| Using global sun averages | Overestimated performance |
➡️ Always use local solar data (not general country averages) before final sizing.
What Tools Help with Solar Lighting Design?
| Tool / Platform | Best Use |
|---|---|
| PVGIS / NREL | Accurate sun-hour data per location |
| HOMER Pro | Off-grid simulations and cost analysis |
| Excel Sheet | Fast manual calculations and comparisons |
| Site Logger | Post-installation energy monitoring |
Personally, I still use a simple Excel sheet I built in 2019—it’s quick, accurate, and field-proven.
FAQs on Solar Street Light System Design
How many days of battery autonomy do I need?
➡️ Minimum 3. In coastal or rainy zones, 4–5 days.
Can I mix different battery types?
➡️ Never. Stick to identical capacity, chemistry, and brand.
Is MPPT always required?
➡️ For high-load systems or variable sun conditions—yes.
Should I oversize panels?
➡️ Yes, by 20–30%. Dust and heat reduce panel output.
What if panel space is limited?
➡️ Increase system voltage (24V/48V) to reduce losses.
Conclusion
I’ve seen solar systems run flawlessly for 6+ years when correctly designed—and I’ve seen “cheap” kits die in 3 months. The difference is always in the engineering.
Get the load right. Design for local sun. Size batteries realistically. And never ignore system compatibility.
That’s how you deliver solar lighting projects that last.
👉 Next Step: Discover how Sunlurio engineers reliable solar street lighting systems for Africa’s off-grid communities.