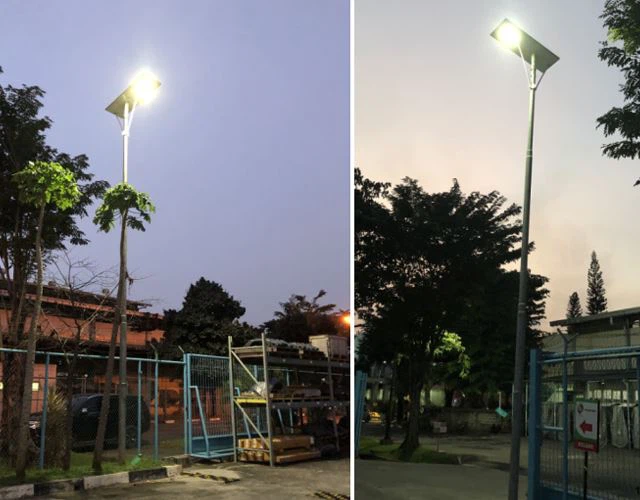
You don’t need heavy machinery or complicated wiring to install an all-in-one solar street light.
With a solid base, proper alignment, and the right tools, I typically complete installations within 30 minutes.
Most clients assume it's a long process. But in my 10+ years working with solar systems in field conditions—especially in Africa and Southeast Asia—I’ve found this to be the fastest and most reliable method.
What Is an All-in-One Solar Street Light?
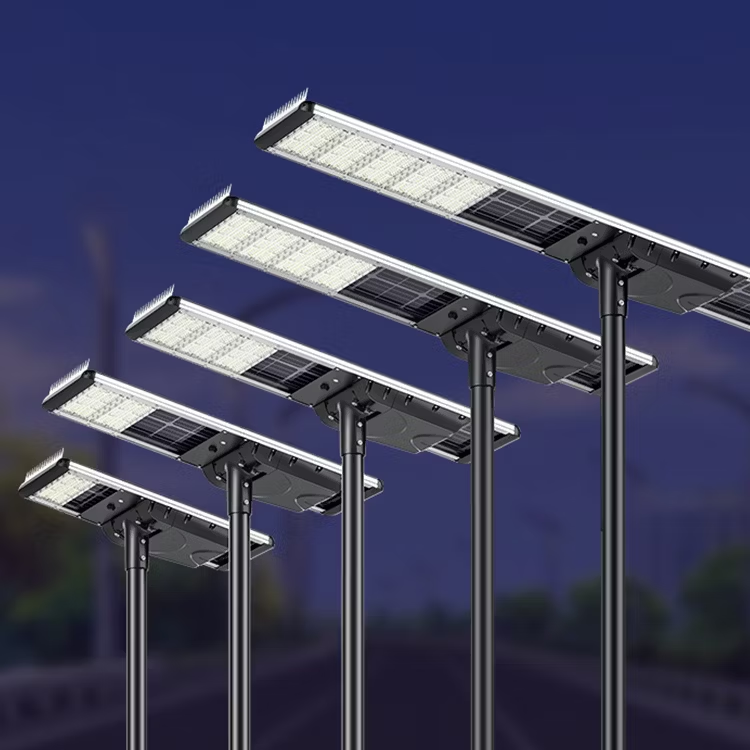
An all-in-one solar street light integrates the solar panel, LED light, lithium battery, and smart controller into one sealed unit.
This compact system simplifies logistics and installation, making it ideal for off-grid and cost-sensitive projects.
I recommend all-in-one models for areas with inconsistent grid power, or for municipal contracts with tight timelines. The benefits are clear:
Core Components and Functions
| Component | Description |
|---|---|
| Solar Panel | Captures solar energy during the day |
| LED Light | Provides efficient nighttime illumination |
| Battery | Stores energy for use at night (usually lithium or LiFePO4) |
| Controller | Automatically manages charging and lighting cycles |
These units are designed to operate independently for 3–5 years with minimal maintenance. They are also IP65-rated and wind-resistant—important for outdoor environments.
Pre-Installation Checklist?
Before heading to site, I always double-check this list. A missing bracket or uncharged light will delay the project.
Preparation avoids errors and ensures the system functions immediately after installation.
My Site Checklist
| Item | Details |
|---|---|
| Fully Charged Light | Leave under sunlight 6–8 hours before dispatch |
| Galvanized Pole | 5 to 8 meters, rustproof, with flange base |
| Mounting Bracket Set | Comes with the light, confirm bolt size matches pole |
| Anchor Bolts & Nuts | Four-bolt base with chemical anchors if needed |
| Tools | 19mm wrench, level tool, adjustable spanner |
| PPE | Gloves, helmet, boots, reflective vest |
🛠 I once had a team arrive on-site in Uganda with a light that was only half-charged. The result? It didn’t turn on until the second day. That’s why we always pre-charge now.
Step-by-Step Installation Guide (Total Time: 30 Minutes)?
There’s no guesswork involved if you follow a repeatable process.
From base to pole top, the full procedure takes under 30 minutes for experienced crews.

✅ Step 1: Foundation and Anchor Check (5 mins)
A strong, level base is essential. I use a bubble level every time.
- Confirm concrete curing (minimum 72 hours if freshly poured)
- Mark anchor bolt holes using the supplied template
- Drill and place M16 or M20 bolts (depending on wind zone specs)
✅ Step 2: Light and Bracket Assembly (5 mins)
This step should be done on a padded surface to avoid panel damage.
- Attach the mounting bracket to the unit
- Fasten with stainless bolts and washers
- If the light has adjustable tilt, set angle to local latitude ±5°
✅ Step 3: Mount Light to Pole (10 mins)
Some lights are 15–20kg. Two people should handle the lift.
- Align bracket onto pole head
- Position solar panel to face geographic south (or north, if in Southern Hemisphere)
- Tighten all bolts, double-check torque settings
✅ Step 4: Raise Pole and Secure (10 mins)
Safety is key. Use guide ropes or a small crane for taller poles.
- Lift pole vertically into position
- Align bolt holes to foundation
- Secure using washers, spring nuts, and torque wrench
🎯 Once raised, the system is live. The light will operate automatically from dusk till dawn.
Common Mistakes to Avoid?
Even skilled installers sometimes skip steps under time pressure.
These are the mistakes I see most often—and how to prevent them.

| Mistake | What I Recommend |
|---|---|
| Incorrect Panel Orientation | Use a compass app to verify true north/south alignment |
| Installing Uncharged Light | Charge fully for 8 hours to activate internal system |
| Wrong Pole Height | Minimum 5m for open roads, 6–8m for highways |
| Loose Fasteners | Use torque wrench; recheck after 24 hours post-install |
FAQs?
These questions come up almost every time I meet a new distributor or government client.
They’re worth addressing early to set clear expectations.
Q1: Can I install this with just two people?
A: Yes, for lights under 25kg and poles under 8 meters. Larger units require lifting equipment.
Q2: Do I need special permits?
A: Not usually. These are low-voltage systems. But check local municipal rules.
Q3: What happens if it rains during install?
A: All components are sealed. Just avoid installing on wet concrete or in muddy areas.
Q4: What’s the average lifespan?
A: Battery: 3–5 years; Panel: 10–15 years; LED chip: 50,000+ hours.
Conclusion
All-in-one solar street lights are engineered for fast, hassle-free setup.
As long as you follow the foundation, alignment, and tightening process carefully, 30 minutes is realistic for a full install.