If you're tired of complicated installations and constant maintenance, all-in-one solar street lights could be your perfect solution.
All-in-one solar street lights combine everything—solar panel, battery, controller, and LED—into one compact body. This guide helps you understand where each part goes, how to install it, and what to consider when choosing the right model.
These lights simplify solar lighting. But a lot can still go wrong if you ignore component positioning or buy without knowing key specs. So, let’s walk through the details together.
Why Choose All-in-One Solar Street Lights?
All-in-one solar lights solve three big problems: messy wiring, long installation time, and maintenance headaches.
They pack the solar panel, battery, controller, and LED light into a single body. This makes them ideal for fast deployment—especially in areas with limited infrastructure.
The compact structure of all-in-one solar street lights ensures faster installation, cleaner look, and lower failure rate over time.
Their modular design is also space-saving and weather-resistant. In this guide, I’ll explain what’s inside these lights, how to install them right, how to pick the right model, and how to make them last longer.
What Are the Key Components in an All-in-One Solar Street Light?
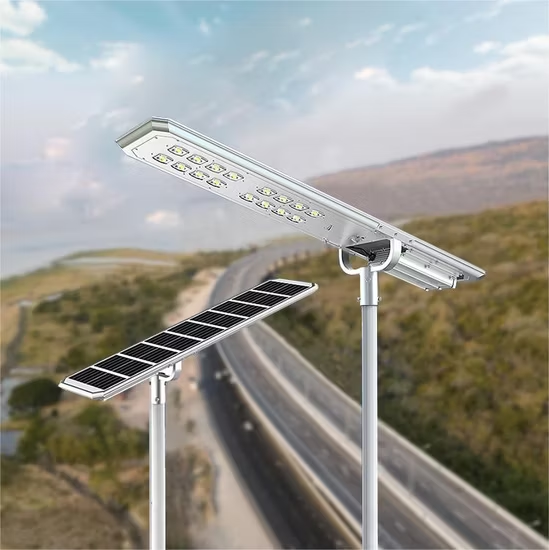
At first glance, an all-in-one unit might look like just a lamp. But inside, it’s a smart system working in harmony.
Each all-in-one light includes a solar panel, LED light, battery, controller, and sensors—all working together to collect, store, and deliver light efficiently.
Let’s break it down.
✅ Typical Components Inside:
| Component | Function |
|---|---|
| Solar Panel | Captures sunlight to charge the battery |
| LED Light | Emits light using stored energy |
| Lithium Battery | Stores energy during the day |
| Controller | Manages power flow and sensor behavior |
| Sensors | Detect motion or daylight to optimize light use |
| Mounting Arm | (Optional) Helps attach the unit to pole or wall |
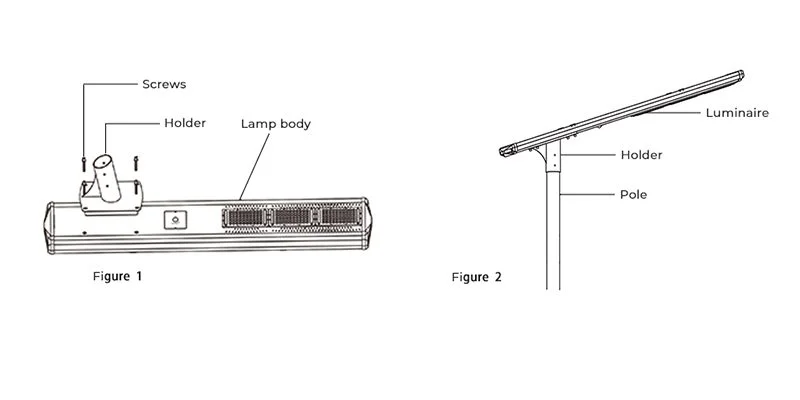
Having a visual diagram to show these placements can help a lot. It’s something we include in our user manuals at Huaweilight, and I highly recommend requesting one if your supplier doesn’t offer it.
Installation Positions of Each Component: What Goes Where & Why?
Installing isn’t just about putting it on a pole. You need the right angles, right direction, and understanding of each component’s role.
Proper component positioning ensures maximum light efficiency, battery life, and sensor accuracy.

3.1 Solar Panel Placement
Facing the wrong way? The whole system fails. It’s that simple.
The solar panel must face true south (or north if you’re in the Southern Hemisphere), at a tilt angle that matches your location’s latitude.
This ensures maximum energy collection.
Key Tips:
- Avoid any shadows during daytime hours (buildings, trees, wires)
- Check your local solar map to find optimal tilt angles
- Clean regularly to prevent dust buildup
In Uganda, for instance, the optimal panel tilt is roughly 10–15 degrees. Our customers in Kampala often face performance drops when trees nearby aren't trimmed. So always assess the site first.
3.2 LED Light Fixture Direction
Even the brightest light is useless if it doesn’t hit the right area.
The LED head should point downward at a slight angle to spread light evenly over the road or path. Mounting height depends on wattage—usually 4–8 meters.
Common Mistakes:
- Mounting too low: poor coverage
- Mounting too high: reduced brightness per square meter
- Facing wrong angle: uneven light distribution
Here’s a quick height vs. wattage reference:
| Mounting Height | Recommended Wattage |
|---|---|
| 4–5 meters | 20W–30W |
| 6–7 meters | 40W–60W |
| 8+ meters | 80W–100W |
3.3 Battery & Controller Integration
This is where the magic happens—and where many overlook safety.
The battery and controller are usually sealed inside the lamp body, making the unit waterproof and theft-resistant.
But that doesn’t mean you can ignore them.
Look For:
- IP65 or higher waterproof rating
- Overcharge/discharge protection
- Temperature range specs (especially for lithium batteries)
Some cheaper models skip these protections. I once had a client in Kenya receive 30 units from another supplier—all of them failed in the first rainy season due to poor sealing.
3.4 Motion & Light Sensor Position
If your light turns on late or doesn’t turn on at all, blame the sensor.
Motion sensors should face outward, toward the target area, with a clear field of view. Light sensors should face the sky without obstruction.
Sensor Specs to Know:
- Detection range: usually 6–12 meters
- Angle: 120–180 degrees for motion detection
- Delay time: how long light stays on after motion
If you install too high or angle incorrectly, your light might never activate when needed.
How to Choose the Right All-in-One Solar Street Light?
The perfect light doesn’t exist. But the perfect light for your job does.
Match your use-case with the right technical specs—wattage, lumen, battery size, and budget—to avoid disappointment.

4.1 Based on Application Scenario
Use-Case Based Chart:
| Location | Recommended Wattage | Features to Look For |
|---|---|---|
| Rural Roads | 30W–40W | Long battery backup |
| Factory Yards | 60W–100W | High lumen output |
| Parks & Pathways | 20W–30W | Motion sensor, wide beam |
In my experience, motion sensors are a game-changer for low-traffic areas. They save power and extend battery life significantly.
4.2 Based on Technical Specs
It’s easy to get overwhelmed by numbers. Focus on these key ones:
| Parameter | What It Affects |
|---|---|
| Wattage (W) | Brightness |
| Lumen Output (lm) | Visual brightness perception |
| Battery Capacity | Backup time |
| Solar Panel Wattage | Charging speed |
| Charge Time | Daylight hours needed for full charge |
For Uganda’s sunlight (avg. 5–6 hours daily), go for lights with 6–8 hour full charge cycles and at least 10–12 hours of backup.
4.3 Climate & Weather Considerations
Sunny areas are easier. But don’t panic if your region is cloudy.
Choose lights with MPPT controllers for better charging efficiency, and larger battery capacity if you're in rainy zones.
| Climate Type | Key Considerations |
|---|---|
| Sunny (5–7 hrs) | Smaller panel, standard battery |
| Cloudy (3–4 hrs) | MPPT controller, larger panel/batt |
| Mixed Weather | Motion sensor + smart control |
4.4 Budget vs Performance Balance
Cheap units are tempting—but can cost more long term.
Don’t just look at price. Check for certified components, warranties, and real backup time claims.
Look out for:
- Unbranded batteries
- No warranty or after-sales support
- Fake lumen ratings
In 2023, one client told me their “bargain” purchase had a 6-month life span. We helped them switch to our mid-tier 40W models—and they’re still running strong today.
Installation Process Step-by-Step (DIY-Friendly or Not?)
Good news—most all-in-one lights are DIY-friendly. But only if you follow the steps carefully.
Standard installation takes 20–40 minutes. You need basic tools like a wrench, ladder, and screws.
Steps:
- Check all components
- Assemble lamp and mounting arm
- Fix to pole or wall
- Adjust angle of solar panel and light
- Test functionality after sunset
When to Call a Pro:
- For pole foundation or cement base
- High mounting heights (over 6m)
- Grid integration or timer setup
Common Installation Mistakes to Avoid
You don’t want to learn these the hard way.
Wrong tilt, shading, poor sealing—these simple errors can ruin a great product.
Top mistakes I’ve seen:
- Solar panel facing east/west instead of south
- Installed under a tree
- Loose bolts leading to lamp drop
- Motion sensor angled toward the wall
Checklist:
✅ Proper direction
✅ No shading
✅ Tight screws
✅ Waterproof seal intact
All-in-One vs Traditional Split-Type Solar Lights: A Quick Comparison
Sometimes split-type is better. But usually, all-in-one is faster and simpler.
| Feature | All-in-One | Split-Type |
|---|---|---|
| Installation Time | 30 mins | 2–3 hours |
| Efficiency | Slightly lower | Higher (custom setup) |
| Maintenance | Low | Higher |
| Aesthetics | Sleek | Bulky |
| Cost | Lower upfront | Higher upfront |
We recommend all-in-one for rural roads, parks, and residential areas. Use split-type only when you need oversized panels or customized setups.
Use Cases & Success Stories
We’ve installed lights across Africa and Asia. Here are a few examples.
One recent project in Southeast Asia involved 200+ all-in-one lights in a supermarket parking lot. Installation took just 5 days.
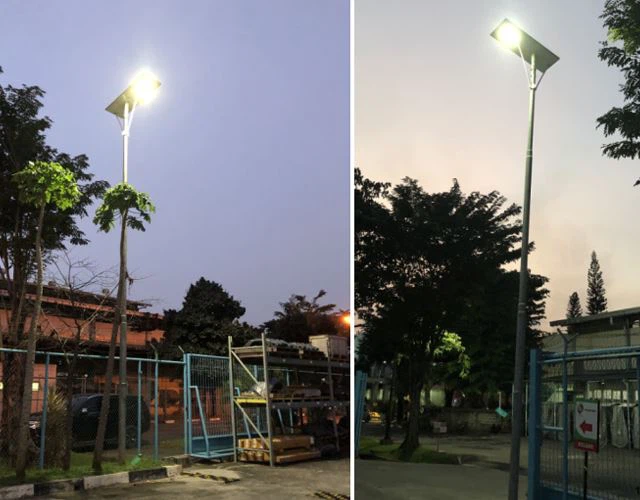
In Uganda, we helped a rural township install 80 lights along a main road using 40W motion-sensor models. After 1 year, 100% are still functional.
We also worked with an industrial facility needing high-mast 100W lights. They wanted zero wiring. We delivered a fully solar setup with success.
Maintenance Tips to Maximize Lifespan
Solar doesn’t mean zero maintenance.
Clean panels monthly, check battery once a year, and monitor sensors for dust or spider webs.
Maintenance Checklist:
| Task | Frequency |
|---|---|
| Clean Solar Panel | Monthly |
| Check Sensors | Quarterly |
| Battery Health Check | Yearly |
| Tighten Screws | Bi-Annual |
A little care goes a long way—especially in humid or dusty regions.
Final Checklist Before Buying
Before placing that order, tick these off:
✅ Suitable for your location and application
✅ Uses certified components (e.g. CE, RoHS)
✅ Comes with warranty and tech support
✅ Clear installation instructions provided
Conclusion
Component placement and model selection make all the difference. Pick wisely, install correctly, and your all-in-one solar light will serve for years.
Looking for reliable all-in-one solar lights? Contact us for expert advice and tailored solutions.